

OpenVINO Toolkit安装成功后,可以编译运行官方release的demos or samples。本篇分别针对Linux和Windows 研究一下如何编译及运行这些demos 或 samples。
一、For linux
官方支持的Linux构建环境如下:
* Ubuntu* 16.04 LTS 64位或CentOS* 7.4 64位
* GCC* 5.4.0(用于Ubuntu* 16.04)或GCC* 4.8.5(用于CentOS* 7.4)
* CMake*版本2.8或更高。
demos位于/opt/intel/openvino/deployment_tools/inference_engine/demos。
1. 使用OpenVINO自带脚本编译全部demos:
cd /opt/intel/openvino/deployment_tools/inference_engine/demos && ./ build_demos.sh
编译完成后生产的可执行文件位于$HOME/omz_demos_build/intel64/Release目录下。例如在该目录下运行interactive_face_detection_demo,运行命令及结果如下
./interactive_face_detection_demo -i /mnt/hgfs/Linux/videos/People\ In\ The\ Street_720p.mp4 -m /mnt/hgfs/Linux/models/2020model32/face-detection-adas-0001.xml -m_ag /mnt/hgfs/ Linux/models/2020model32/age-gender-recognition-retail-0013.xml -m_em /mnt/hgfs/ Linux/models/2020model32/emotions-recognition-retail-0003.xml -m_hp /mnt/hgfs/ Linux/models/2020model32/head-pose-estimation-adas-0001.xml -m_lm /mnt/hgfs/ Linux/models/2020model32/facial-landmarks-35-adas-0002.xml -d CPU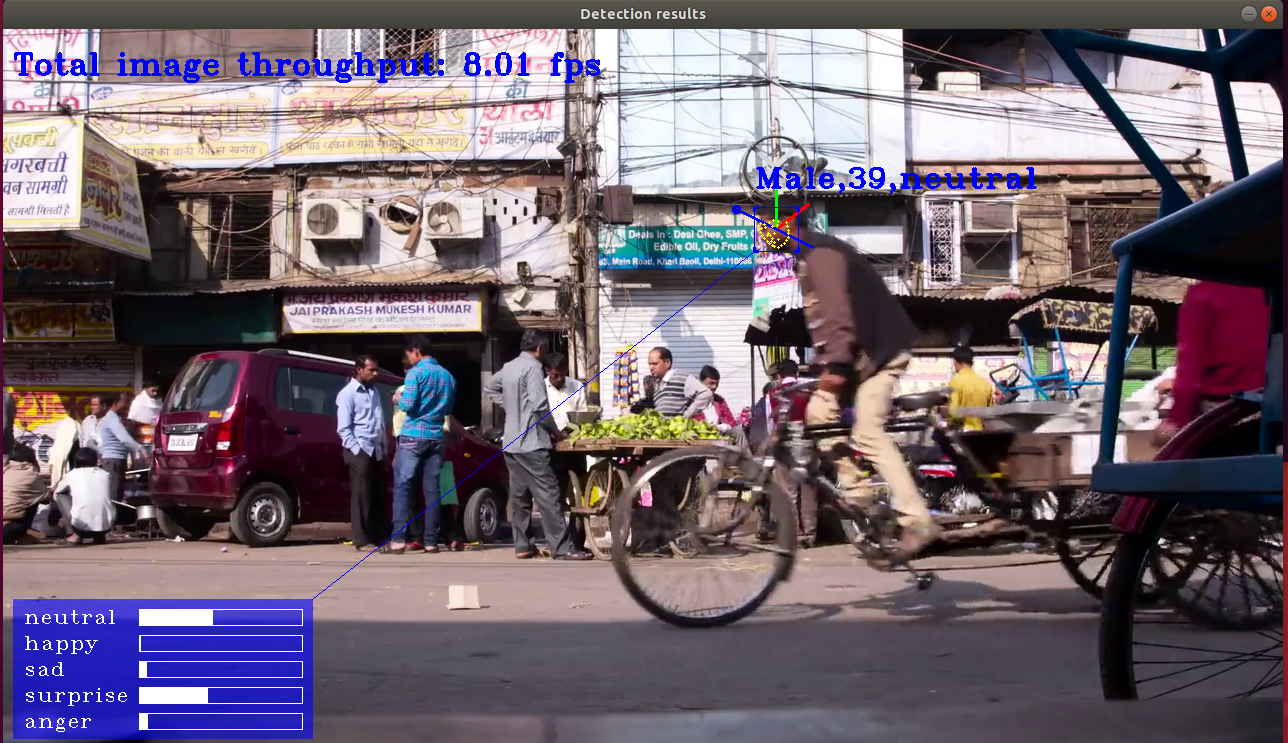
2. 单独编译某个demo:这里以编译object_detection_demo_ssd_async为例,步骤如下---
1) 首先需要创建一个编译后的输出目录:mkdir -p ~/ie_demos_build
2) cd ~/ie_demos_build
3) cmake -DCMAKE_BUILD_TYPE=Release /opt/intel/openvino/deployment_tools/inference_engine/demos
4) make object_detection_demo_ssd_async
编译完成后生成的可执行文件位于~/ie_demos_build/intel64/Release目录下,运行命令及结果如下图---
./object_detection_demo_ssd_async -i /dev/video0 -m /mnt/hgfs/Linux/models/ir/fp32/ssd300/ssd300.xml -d CPU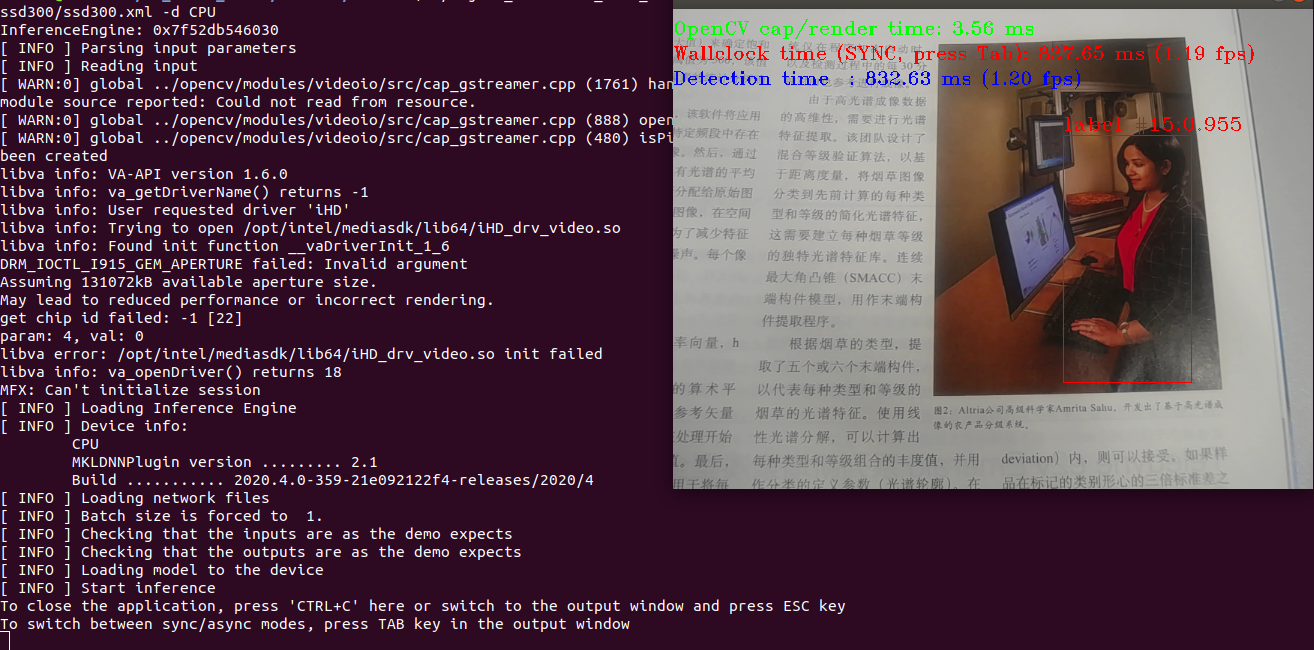
3. 编写txt文件针对单个demo或自己编写的程序进行编译:
以hello_classification为例,拷贝hello_classification源码到指定目录下,并将该目录下的CMakeLists.txt删掉,重新编辑CMakeLists.txt文件如下---
  1 cmake_minimum_required(VERSION 2.8)

  2 #SET(CMAKE_C_COMPILER  "gcc-5")

  3 #SET(CMAKE_CXX_COMPILER "g++-5")

  4 project(hello_classification)

  5

  6 set(CMAKE_CXX_STANDARD 11)

  7

  8 if (CMAKE_BUILD_TYPE STREQUAL "")

  9     message(STATUS "CMAKE_BUILD_TYPE not defined, 'Release' will be used")

 10     set(CMAKE_BUILD_TYPE "Release")

 11 endif()

 12

 13 include_directories(/opt/intel/openvino/deployment_tools/open_model_zoo/demos/common)

 14 include_directories(/opt/intel/openvino/deployment_tools/open_model_zoo/demos/common/monitors)

 15 include_directories(/opt/intel/openvino/deployment_tools/inference_engine/samples/cpp/common/format_reader)

 16 include_directories(/opt/intel/openvino/deployment_tools/inference_engine/samples/cpp/common)

 17 include_directories(/opt/intel/openvino/deployment_tools/inference_engine/samples/cpp/common/samples)

 18 include_directories(/opt/intel/openvino/deployment_tools/inference_engine/src/extension)

 19

 20add_subdirectory(/opt/intel/openvino/deployment_tools/inference_engine/samples/cpp/thirdparty/gflags gflags)

 21add_subdirectory(/opt/intel/openvino/inference_engine/samples/cpp/common/format_reader format_reader)

 22

 23 set (HAVE_SYS_STAT_H 1)

 24 set (HAVE_INTTYPES_H 1)

 25

 26 #set(OpenCV_DIR /usr/local/opencv3.4.1/share/OpenCV)

 27 find_package(OpenCV REQUIRED)

 28 if(OpenCV_FOUND)

 29     message(STATUS "OPENCV found")

 30 else (OpenCV_FOUND)

 31     message(WARNING "OPENCV is disabled or not found")
32 return()
33 endif()
34
35 set(InferenceEngine_DIR /opt/intel/openvino/inference_engine/share)
36 if (IE_NOT_FOUND_MESSAGE)
37 find_package(InferenceEngine 1.6 QUIET)
38 if (NOT(InferenceEngine_FOUND))
39 message(FATAL_ERROR ${IE_NOT_FOUND_MESSAGE})
40 endif()
41 else()
42 find_package(InferenceEngine 1.6 REQUIRED)
43 endif()
44
45 set (LIB_DL dl)
46
47 include_directories( ${OpenCV_INCLUDE_DIRS} )
48 include_directories( ${InferenceEngine_INCLUDE_DIRS} )
49
50 add_executable(hello_classification main.cpp )
51
52 target_link_libraries(
53 hello_classification
54 ${InferenceEngine_LIBRARIES}
55 ${OpenCV_LIBS}
56 ${LIB_DL}
57 pthread
58 )
编辑完成后依次执行cd hello_classification && mkdir build && cd build && cmake .. && make,然后运行程序结果如下图所示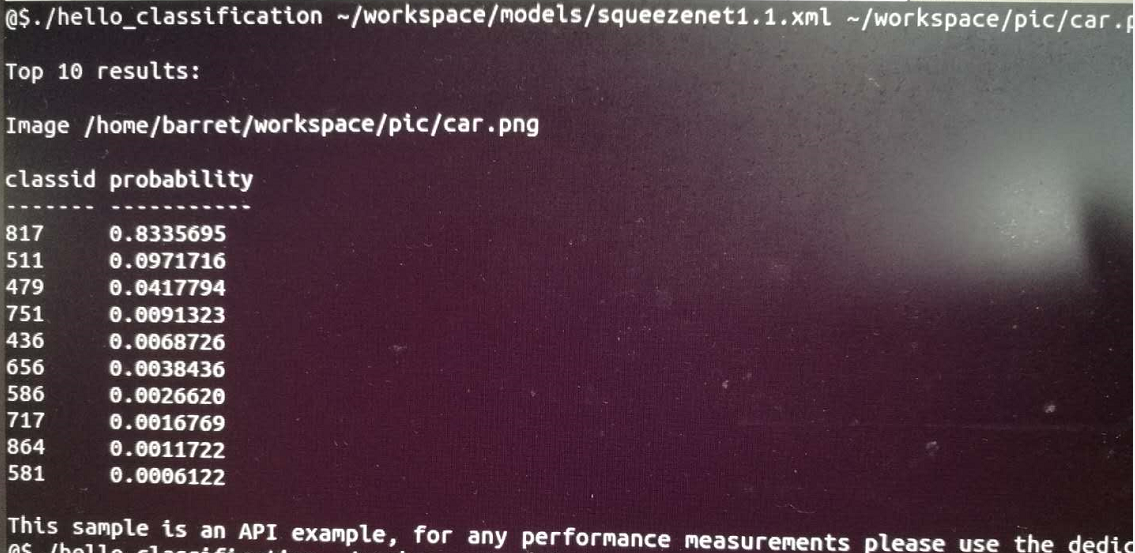
二、For windows
官方推荐的Windows构建环境如下:
*微软视窗系统* 10
* Microsoft Visual Studio* 2015、2017或2019
* CMake*版本2.8或更高
注意:如果你想使用Microsoft Visual Studio 2019,你需要安装CMake 3.14。
1. 使用OpenVINO自带的脚本编译demos
cd C:\Program Files (x86)\IntelSWTools\openvino\deployment_tools\inference_engine\demos后执行批处理文件build_demos_msvc.bat
默认情况下,脚本自动检测机器上安装的最高Microsoft Visual Studio版本,并使用它来创建和构建演示代码的解决方案。您还可以选择指定脚本使用的预先提供的Microsoft Visual Studio版本。支持版本有:“VS2015”、“VS2017”、“VS2019”。例如,要使用Microsoft Visual Studio 2017构建演示程序,可以使用以下命令:
build_demos_msvc.bat VS2017
生成的二进制文件位于C:\Users\username \Documents\Intel\OpenVINO\omz_demos_build_build\intel64\Release '目录下。
cd C:\Users\username \Documents\Intel\ OpenVINO\OpenVINO\omz_demos_build_build\intel64\Release 命令行中执行如下命令---
interactive_face_detection_demo.exe -m D:\WinLinShare\Movidius\x86\2020.3model32\face-detection-adas-0001.xml -m_ag D:\WinLinShare\Movidius\x86\2020.3model32\age-gender-recognition-retail-0013.xml -m_em D:\WinLinShare\Movidius\x86\2020.3model32\emotions-recognition-retail-0003.xml -m_hp D:\WinLinShare\Movidius\x86\2020.3model32\head-pose-estimation-adas-0001.xml -m_lm D:\WinLinShare\Movidius\x86\2020.3model32\facial-landmarks-35-adas-0002.xml -d CPU -i "D:\WinLinShare\Movidius\video\People In The Street.mp4"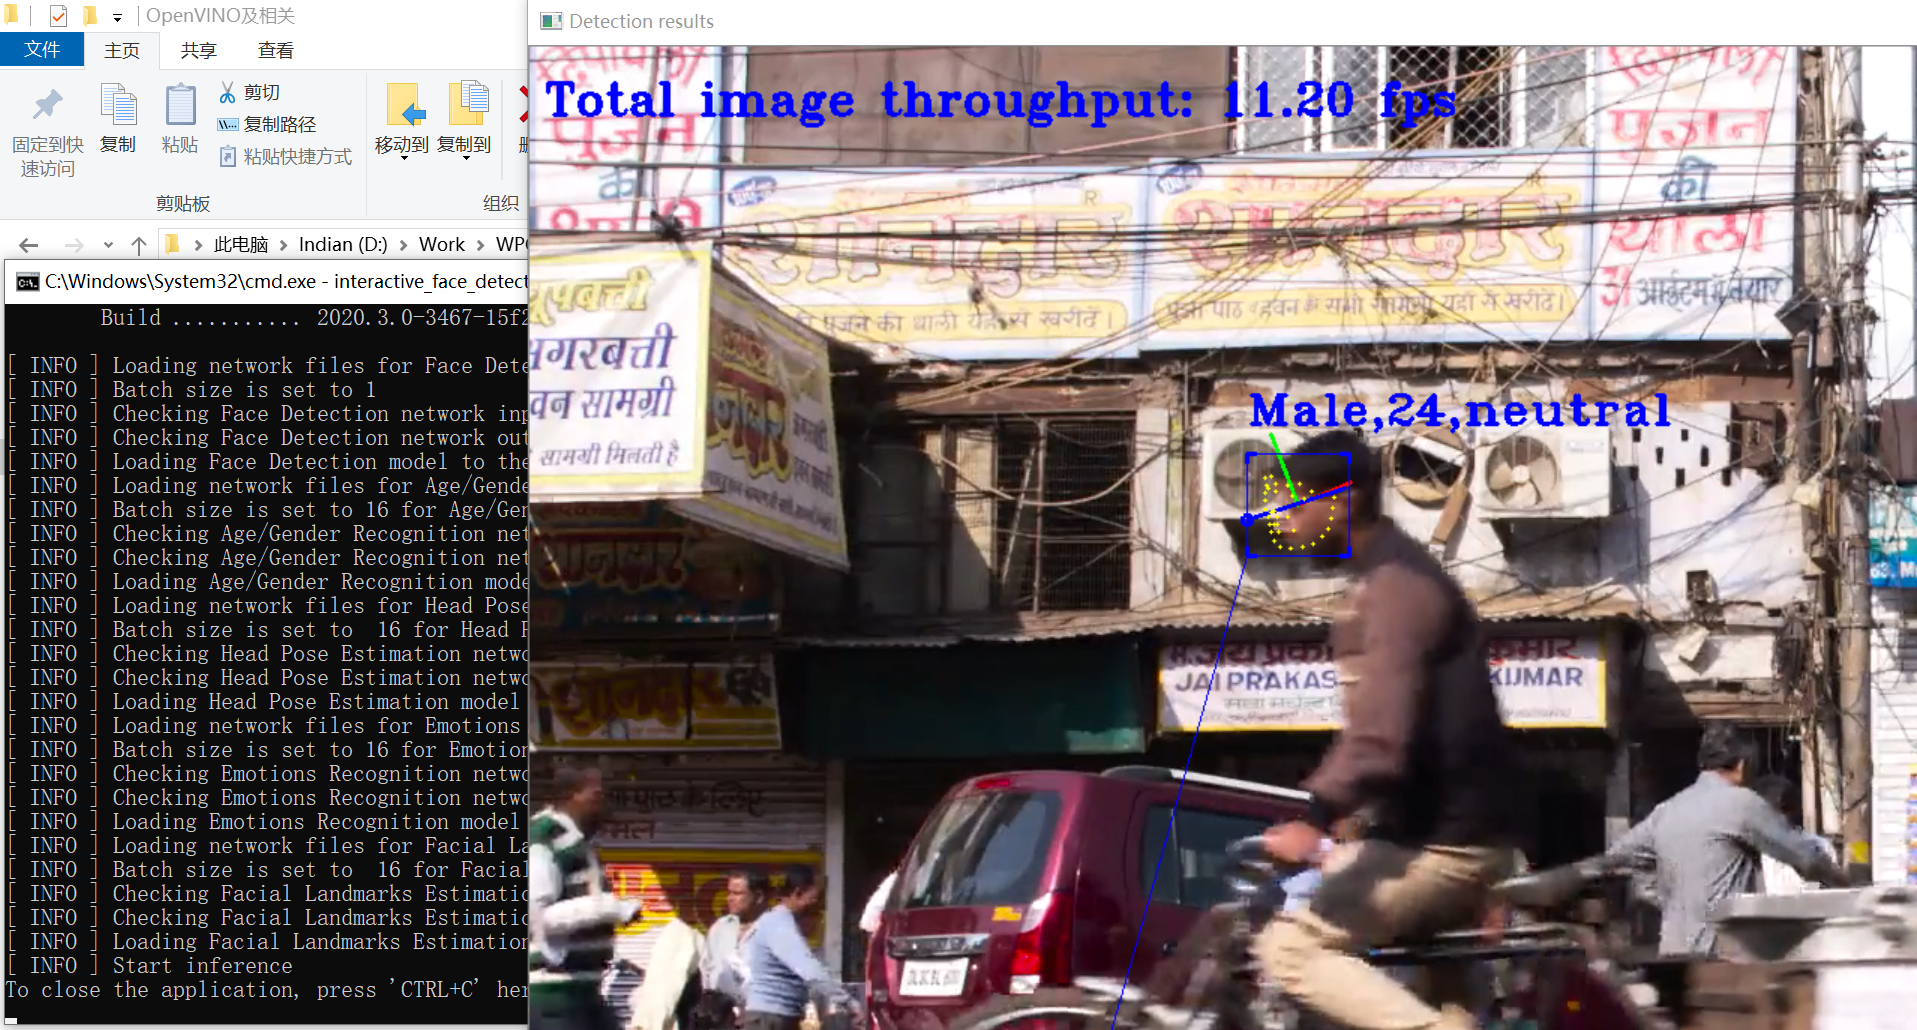
同时在C:\Users\username \Documents\Intel\ OpenVINO\OpenVINO\omz_demos_build_build目录下生成了.sln/.vcxproj/.vcxproj.filters等文件,可用Visual Studio C++工具继续编译。点击Samples.sln文件,用Miscroso Visual Studio 2017打开如下图所示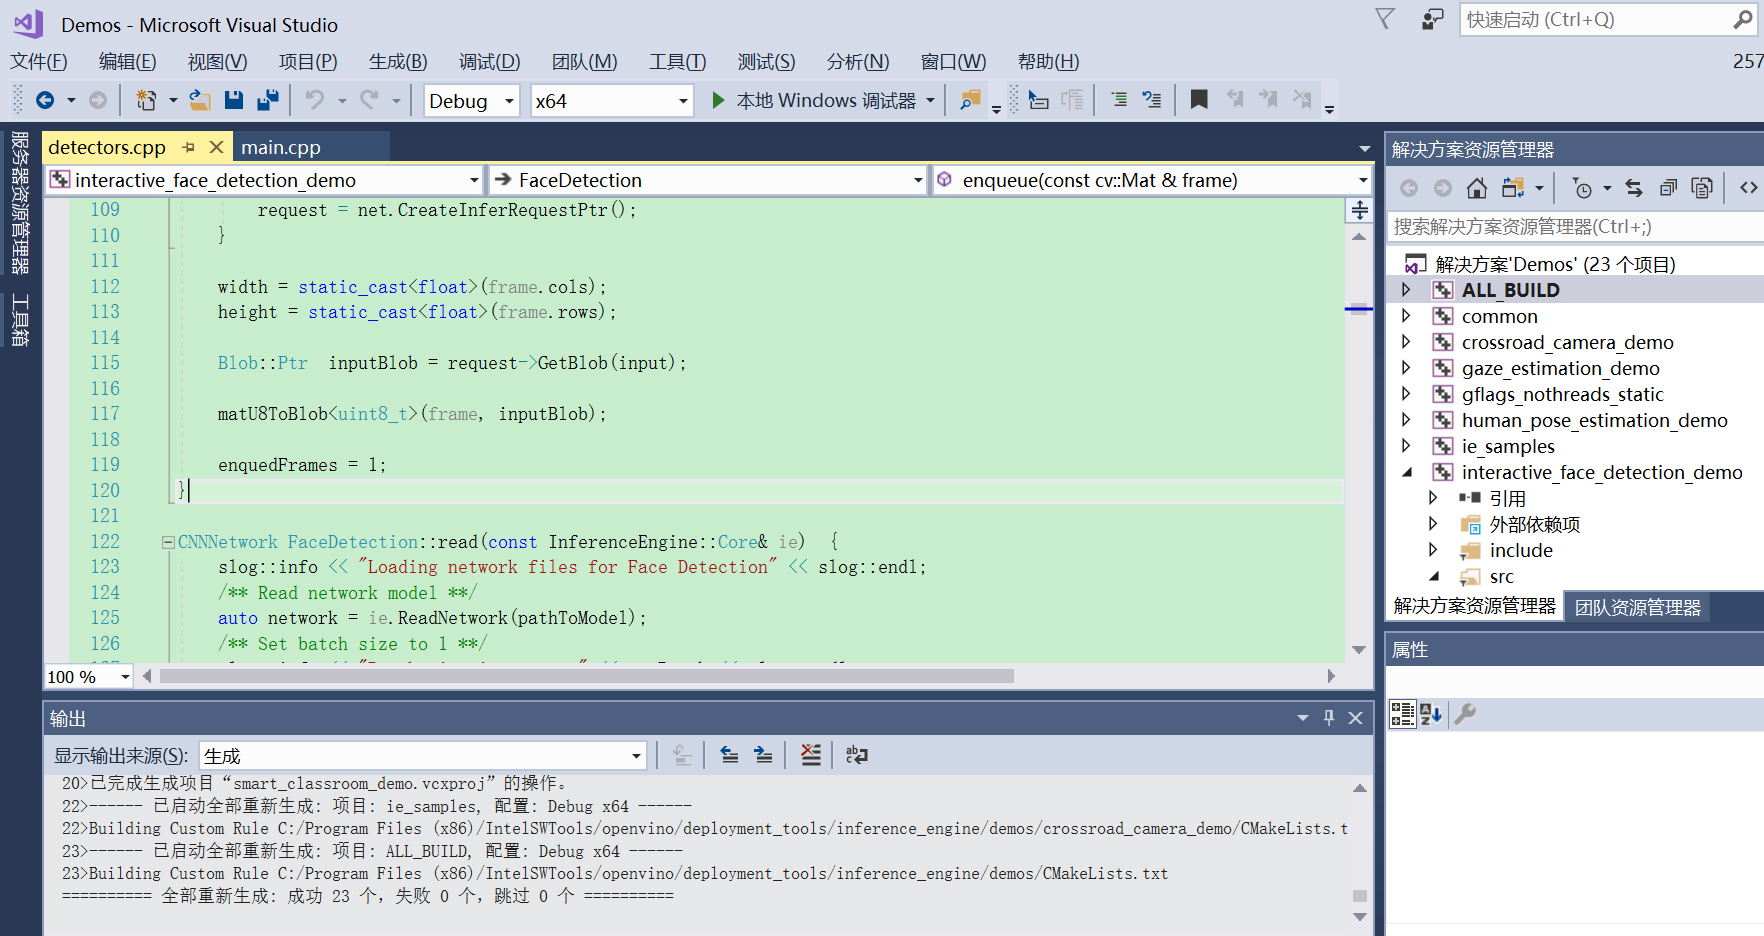
也可以根据需要在VS中进行再编辑编译生成目标可执行文件。
评论