

前言
有时候,工程师会开发一些网页去对自家的产品进行资料的撷取,这会需要使用到 web server 及 php 程式。
因此,本篇文章将说明如何启用 Yocto 的 web server 及 php,并且示范如何在 OP-Killer 上使用。
Yocto Web Server
下面会列出 i.MX 有提供的 web server
本篇文章则是以 lighttpd 为例
poky/meta/recipes-extended/lighttpd
- lighttpd
meta-openembedded/meta-webserver/recipes-httpd
- apache2
- apache-mod
- cherokee
- hiawatha
- monkey
- nginx
- sthttpd
补充:
meta-openembedded/meta-webserver
会需要加进
conf/bblayers.conf
,才让 bitbake 能找到 recipes-httpd 提供的 web server
conf/local.conf
将下方的内容新增至
conf/local.conf
,启用 lighttpd 及 php
IMAGE_INSTALL:append = " lighttpd lighttpd-module-*"
IMAGE_INSTALL:append = " php php-cli php-fpm php-cgi"
执行编译
设定完成后,重新编译 core-image-minimal
bitbake core-image-minimal
lighttpd 及 php
image 烧录完成并且进入系统后,还有一些设定需要完成
lighttpd.conf
修改
/etc/lighttpd/lighttpd.conf
启用 php,请参考下方内容
@@ -21,7 +21,7 @@
 #                               "mod_auth",
 #                               "mod_status",
 #                               "mod_setenv",
-#                               "mod_fastcgi",
+                               "mod_fastcgi",
 #                               "mod_proxy",
 #                               "mod_simple_vhost",
 #                               "mod_evhost",
@@ -211,14 +211,14 @@
 #### fastcgi module
 ## read fastcgi.txt for more info
 ## for PHP don't forget to set cgi.fix_pathinfo = 1 in the php.ini
-#fastcgi.server             = ( ".php" =>
-#                               ( "localhost" =>
-#                                 (
-#                                   "socket" => "/tmp/php-fastcgi.socket",
-#                                   "bin-path" => "/usr/local/bin/php"
-#                                 )
-#                               )
-#                            )
+fastcgi.server             = ( ".php" =>
+                               ( "localhost" =>
+                                 (
+                                   "socket" => "/tmp/php-fastcgi.socket",
+                                   "bin-path" => "/usr/bin/php-cgi"
+                                 )
+                               )
+                            )

 #### CGI module
 #cgi.assign                 = ( ".pl"  => "/usr/bin/perl",
phpinfo
新增 /www/pages/info.php
<?php
phpinfo();
?>
重启 lighttpd
为了应用新的设定,需要重启 lighttpd
systemctl restart lighttpd
启用 lighttpd
可以使用
systemctl
让 lighttpd 在下次开机时自动执行
systemctl enable lighttpd
测试
设定 IP 位址
请将电脑与 OP-Killer 连接,并设定该电脑的 IP 位址(192.168.1.1)
完成后,输入下方指令,设定 OP-Killer 的 IP 位址(192.168.1.100)
ifconfig eth0 192.168.1.100
测试网页
确定电脑与 OP-Killer 连接及设定后,请点开下方网址
出现下方画面即可确定 lighttpd 及 php 已成功运行在 OP-Killer 上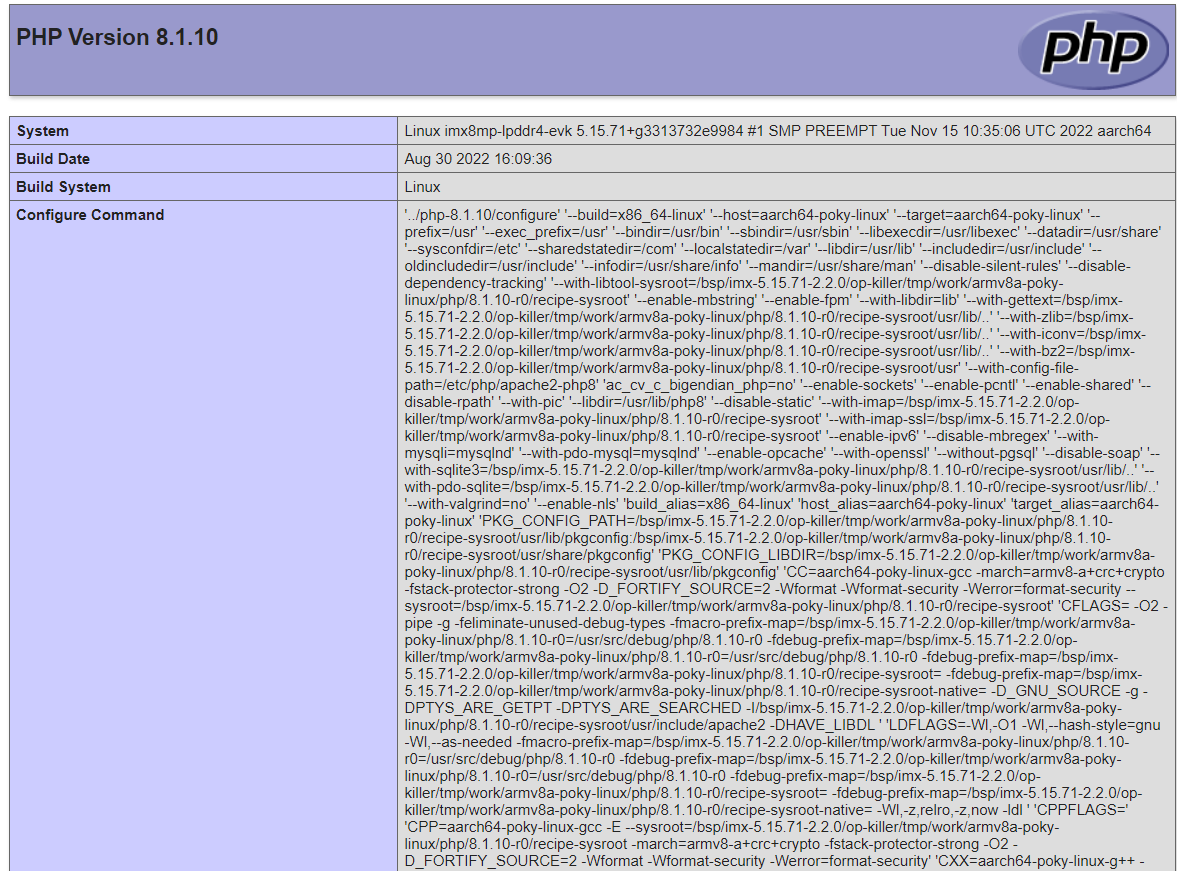

评论