

一. 前言
世平集团针对 NXP 的 MPU 相关技术整理了一系列博文,其中也包含了硬体、软体、实际应用等的相关技术文章。此网页为详细的博文索引架构,笔者希望能够透过这些博文协助大家更了解 NXP 的 MPU 相关技术,未来也会持续更新此系列的相关博文还恳请各位读者们多多支持!而本篇博文会针对 i.MX8 系列相关技术索引中的 【ATU Book-i.MX8 系列-IO】NXP i.MX8ULP 基本功能验证 这篇文章做介绍。
在 i.MX8ULP 平台上有丰富的周边 IO 并且支援许多的功能,本篇文章将会初步介绍一些周边的功能验证方法,给对 i.MX8ULP 平台有兴趣的读者们做个参考,再麻烦大家继续看下去啰。
二. i.MX8ULP Display 相关验证
i.MX8ULP 在 Display 部分支援:
- MIPI DSI (4-lane)。
- EPD ( Electrophoretic Display ) Display。
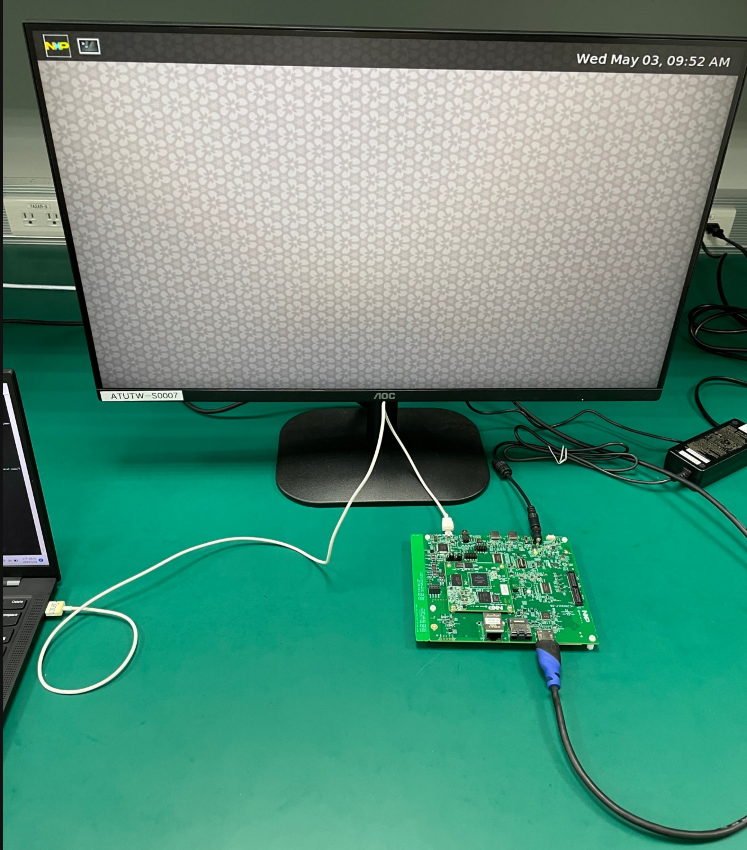
值得一提的是 i.MX8ULP 公板预设有上件一颗 MIPI To HDMI 的 Converter IC ( IT6161 ),只要使用 i.MX8ULP 预设的 Device Tree 就可以 Enable 此功能啰。
下图为使用 i.MX8ULP 公板上的 MIPI DSI To HDMI 输出画面的截图。
三、 i.MX8ULP Camera 相关验证
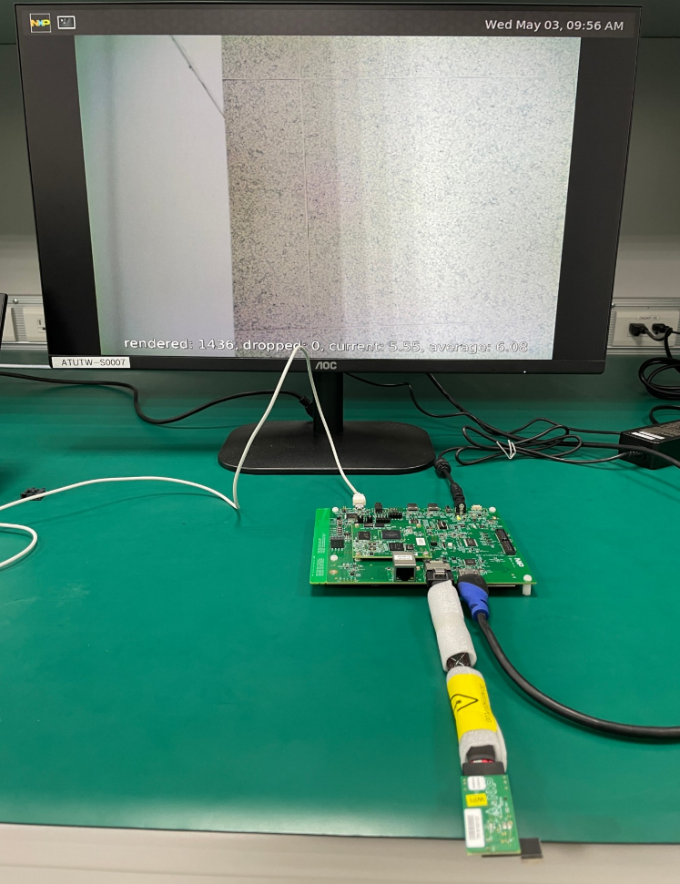
i.MX8ULP 在 Camera 部分支援 2 Lane 的 MIPI CSI,那 i.MX8ULP 公板预设可以支援 OV5640 Camera,只要使用 i.MX8ULP 预设的 Device Tree 以及输入以下 Command 可以测试此功能啰。
root@imx8ulpevk:~# gst-launch-1.0 v4l2src device=/dev/video0 ! fpsdisplaysink
Setting pipeline to PAUSED ...
Pipeline is live and does not need PREROLL ...
Pipeline is PREROLLED ...
Setting pipeline to PLAYING ...
New clock: GstSystemClock
[   75.764816] bypass csc
[   75.767210] input fmt YUV4
[   75.769916] output fmt YUYV
Redistribute latency...
handling interrupt.:99.
Interrupt: Stopping pipeline ...
Execution ended after 0:00:43.968241000
Setting pipeline to NULL ...
Total showed frames (261), playing for (0:00:43.967980000), fps (5.936).

...
下图为在 i.MX8ULP 公板上的使用 OV5640 Camera 并输出画面到 HDMI 的截图。
四、 i.MX8ULP Ethernet 相关验证
i.MX8ULP 支援 10/100 Mbit/s 的 Ethernet,只要使用 i.MX8ULP 预设的 Device Tree 以及输入以下 Command 可以测试此功能啰。
补充:测试前请先确认自己与传输对象的 IP 是否都在相同网段唷。
root@imx8ulpevk:~# ifconfig eth0
eth0: flags=-28605<UP,BROADCAST,RUNNING,MULTICAST,DYNAMIC>  mtu 1500
        inet 169.254.135.16  netmask 255.255.0.0  broadcast 169.254.255.255
        inet6 fe80::204:9fff:fe07:b9ef  prefixlen 64  scopeid 0x20<link>
        ether 00:04:9f:07:b9:ef  txqueuelen 1000  (Ethernet)
        RX packets 6  bytes 1356 (1.3 KiB)
        RX errors 0  dropped 3  overruns 0  frame 0
        TX packets 52  bytes 11232 (10.9 KiB)
        TX errors 0  dropped 0 overruns 0  carrier 0  collisions 0
以下为实际 Ping Google DNS ( Domain Name System ) 8.8.8.8 的截图。
root@imx8ulpevk:~# ping 8.8.8.8
PING 8.8.8.8 (8.8.8.8) 56(84) bytes of data.

...

64 bytes from 8.8.8.8: icmp_seq=1 ttl=115 time=4.46 ms
64 bytes from 8.8.8.8: icmp_seq=2 ttl=115 time=3.50 ms
64 bytes from 8.8.8.8: icmp_seq=3 ttl=115 time=3.40 ms
64 bytes from 8.8.8.8: icmp_seq=4 ttl=115 time=3.43 ms
64 bytes from 8.8.8.8: icmp_seq=5 ttl=115 time=3.53 ms

...
五、 i.MX8ULP WiFi / BT 相关验证
i.MX8ULP 公板预设支援 Murata 的 IW416 ( LBEE5CJ1XK ) M.2 WiFi + BT ( Bluetooth ) Module,以下将会简单说明如何针对 WiFi 与 BT 做测试再麻烦各位读者们继续看下去啰。
Murata 的 IW416 ( LBEE5CJ1XK ) Module 示意图:
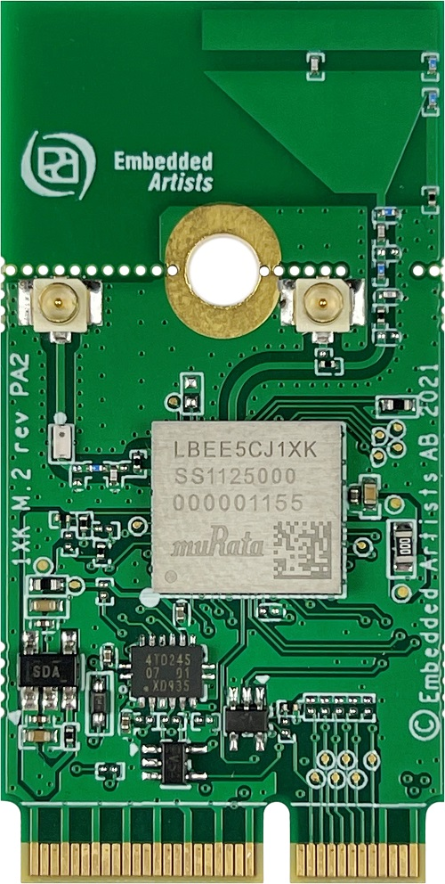
补充:图片来自 https://www.murata.com/zh-cn/products/connectivitymodule/wi-fi-bluetooth/overview/lineup/type1xk
(1) WiFi 验证简述
初步的验证流程如下:
- 先把准备一台 WiFi 热点 分享的设备;本篇范例是用笔者自己的 iPhone 手机做网路的分享。
- 用 i.MX8ULP 公板上的 WiFi 模组连上 WiFi 热点并做连线测试。
先透过 modprobe 命令挂载 moal 模组。
root@imx8ulpevk:~# modprobe moal mod_para=nxp/wifi_mod_para.conf
[  632.249243] mlan: loading out-of-tree module taints kernel.
[  632.290699] wlan: Loading MWLAN driver
[  632.294948] wlan: Register to Bus Driver...
[  632.299905] vendor=0x02DF device=0x9159 class=0 function=1
[  632.305918] Attach moal handle ops, card interface type: 0x108
[  632.314624] SD8978: init module param from usr cfg
[  632.319563] card_type: SD8978, config block: 0
[  632.324607] cfg80211_wext=0xf
[  632.327838] max_vir_bss=1
[  632.330519] cal_data_cfg=none
[  632.333542] ps_mode = 1
[  632.335985] auto_ds = 1
[  632.338486] host_mlme=enable
[  632.341412] fw_name=nxp/sdiouartiw416_combo_v0.bin
[  632.346266] SDIO: max_segs=128 max_seg_size=65535
[  632.351013] rx_work=1 cpu_num=2
[  632.354213] Attach mlan adapter operations.card_type is 0x108.
[  632.360721] wlan: Enable TX SG mode
[  632.364280] wlan: Enable RX SG mode
[  632.369659] Request firmware: nxp/sdiouartiw416_combo_v0.bin
[  632.700978] Wlan: FW download over, firmwarelen=492076 downloaded 492076
[  634.010365] WLAN FW is active
[  634.013361] on_time is 628483098000
[  634.048577] fw_cap_info=0x181c0f03, dev_cap_mask=0xffffffff
[  634.054211] max_p2p_conn = 8, max_sta_conn = 8
[  634.099123] wlan: version = SDIW416---16.92.21.p41.1-MM5X16322.p3-(FP92)
[  634.110885] wlan: Register to Bus Driver Done
[  634.115491] wlan: Driver loaded successfully
root@imx8ulpevk:~# [  636.021179] audit: type=1006 audit(1678354201.380:4): pid=620 uid=0 old-auid=4294967295 auid=0 tty=(none) old-ses=4294967295 ses=3 res=1
[  636.038296] audit: type=1300 audit(1678354201.380:4): arch=c00000b7 syscall=64 success=yes exit=1 a0=3 a1=ffffc5cafdd0 a2=1 a3=ffffb4d15020 items=0 ppid=223 pid=620 auid=0 uid=0 gid=0 euid=0 suid=0 fsuid=0 egid=0 sgid=0 fsgid=0 tty=(none) ses=3 comm="crond" exe="/usr/sbin/crond" key=(null)
[  636.064040] audit: type=1327 audit(1678354201.380:4): proctitle=2F7573722F7362696E2F63726F6E64002D6E
再来笔者透过在 i.MX8ULP 公板上下指令使用 WiFi 模组连线到笔者 iPhone 手机 Shared 出来的 WiFi 热点 。
补充:笔者的手机的 SSID ( Service Set Identifier ) 是 Benson_iPhone 、密码是 WPIATUWithYou 。
root@imx8ulpevk:~# head -n 4 /etc/wpa_supplicant.conf > /etc/wpa_supplicant.conf.tmp
root@imx8ulpevk:~# wpa_passphrase Benson_iPhone WPIATUWithYou >> /etc/wpa_supplicant.conf.tmp
root@imx8ulpevk:~# mv /etc/wpa_supplicant.conf /etc/wpa_supplicant.conf.bak
root@imx8ulpevk:~# mv /etc/wpa_supplicant.conf.tmp /etc/wpa_supplicant.conf
root@imx8ulpevk:~# wpa_supplicant -B -i mlan0 -c /etc/wpa_supplicant.conf -D nl80211
Successfully initialized wpa_supplicant
rfkill: Cannot open RFKILL control device
root@imx8ulpevk:~# [ 870.265539] wlan: mlan0 START SCAN
[ 873.440800] wlan: SCAN COMPLETED: scanned AP count=48
[ 873.455365] wlan: HostMlme mlan0 send auth to bssid 6e:XX:XX:XX:c3:d9
[ 873.465318] mlan0:
[ 873.465344] wlan: HostMlme Auth received from 6e:XX:XX:XX:c3:d9
[ 873.524812] wlan: HostMlme mlan0 Connected to bssid 6e:XX:XX:XX:c3:d9 successfully
[ 873.559295] mlan0:
[ 873.559323] wlan: Send EAPOL pkt to 6e:XX:XX:XX:c3:d9
[ 873.567362] mlan0:
[ 873.567380] wlan: Send EAPOL pkt to 6e:XX:XX:XX:c3:d9
[ 873.574865] mlan0:
[ 873.574879] wlan: HostMlme Disconnected: sub_type=12
[ 873.684292] wlan: mlan0 START SCAN
[ 878.030219] wlan: SCAN COMPLETED: scanned AP count=51
[ 884.090689] wlan: mlan0 START SCAN
[ 888.437205] wlan: SCAN COMPLETED: scanned AP count=54
[ 888.450003] wlan: HostMlme mlan0 send auth to bssid 6e:XX:XX:XX:c3:d9
[ 888.472242] mlan0:
[ 888.472262] wlan: HostMlme Auth received from 6e:XX:XX:XX:c3:d9
[ 888.492384] wlan: HostMlme mlan0 Connected to bssid 6e:XX:XX:XX:c3:d9 successfully
[ 888.618395] mlan0:
[ 888.618423] wlan: Send EAPOL pkt to 6e:XX:XX:XX:c3:d9
[ 888.635067] mlan0:
[ 888.635087] wlan: Send EAPOL pkt to 6e:XX:XX:XX:c3:d9
[ 888.643792] IPv6: ADDRCONF(NETDEV_CHANGE): mlan0: link becomes ready
[ 888.655791] woal_cfg80211_set_rekey_data return: gtk_rekey_offload is
...
接着透过 udhcpc 命令自动取得 IP Address。
root@imx8ulpevk:~# udhcpc -i mlan0
udhcpc: started, v1.35.0
udhcpc: broadcasting discover
udhcpc: broadcasting discover
udhcpc: broadcasting select for 172.20.10.12, server 172.20.10.1
udhcpc: lease of 172.20.10.12 obtained from 172.20.10.1, lease time 86400
/etc/udhcpc.d/50default: Adding DNS 172.20.10.1
用 ifconfig 检查一下。
root@imx8ulpevk:~# ifconfig
lo: flags=73<UP,LOOPBACK,RUNNING>  mtu 65536
        inet 127.0.0.1  netmask 255.0.0.0
        inet6 ::1  prefixlen 128  scopeid 0x10<host>
        loop  txqueuelen 1000  (Local Loopback)
        RX packets 584  bytes 38086 (37.1 KiB)
        RX errors 0  dropped 0  overruns 0  frame 0
        TX packets 584  bytes 38086 (37.1 KiB)
        TX errors 0  dropped 0 overruns 0  carrier 0  collisions 0

mlan0: flags=4163<UP,BROADCAST,RUNNING,MULTICAST>  mtu 1500
        inet 172.20.10.12  netmask 255.255.255.240  broadcast 172.20.10.15
        inet6 fe80::9e50:d1ff:fe45:2595  prefixlen 64  scopeid 0x20<link>
        inet6 2001:b400:e244:5457:9e50:d1ff:fe45:2595  prefixlen 64  scopeid 0x0<global>
        ether 9c:50:d1:45:25:95  txqueuelen 1000  (Ethernet)
        RX packets 13  bytes 2004 (1.9 KiB)
        RX errors 0  dropped 0  overruns 0  frame 0
        TX packets 48  bytes 7568 (7.3 KiB)
        TX errors 0  dropped 0 overruns 0  carrier 0  collisions 0
以下为实际 Ping Google DNS 8.8.8.8 的截图。
root@imx8ulpevk:~#
root@imx8ulpevk:~# ping 8.8.8.8
PING 8.8.8.8 (8.8.8.8) 56(84) bytes of data.
64 bytes from 8.8.8.8: icmp_seq=1 ttl=113 time=252 ms
64 bytes from 8.8.8.8: icmp_seq=2 ttl=113 time=66.6 ms
64 bytes from 8.8.8.8: icmp_seq=3 ttl=113 time=76.7 ms

...
做完以上步骤就可以透过 i.MX8ULP 公板上的 WiFi 模组上网啰。
(2) BT 验证简述
初步的验证流程如下:
- 先把准备一台有 BT 的 PC 并开启蓝芽功能。
- 用 i.MX8ULP 公板上的 BT 模组去跟 PC 上的 BT 做 Pair。
先透过 modprobe 命令挂载 moal 模组。
root@imx8ulpevk:~# modprobe moal mod_para=nxp/wifi_mod_para.conf
[  116.358382] mlan: loading out-of-tree module taints kernel.
[  116.403139] wlan: Loading MWLAN driver
[  116.407391] wlan: Register to Bus Driver...
[  116.412371] vendor=0x02DF device=0x9159 class=0 function=1
[  116.418025] Attach moal handle ops, card interface type: 0x108
[  116.427127] SD8978: init module param from usr cfg
[  116.432102] card_type: SD8978, config block: 0
[  116.437089] cfg80211_wext=0xf
[  116.440137] max_vir_bss=1
[  116.442806] cal_data_cfg=none
[  116.445775] ps_mode = 1
[  116.448248] auto_ds = 1
[  116.450753] host_mlme=enable
[  116.453640] fw_name=nxp/sdiouartiw416_combo_v0.bin
[  116.458491] SDIO: max_segs=128 max_seg_size=65535
[  116.463235] rx_work=1 cpu_num=2
[  116.466415] Attach mlan adapter operations.card_type is 0x108.
[  116.473349] wlan: Enable TX SG mode
[  116.477144] wlan: Enable RX SG mode
[  116.482880] Request firmware: nxp/sdiouartiw416_combo_v0.bin
[  116.814424] Wlan: FW download over, firmwarelen=492076 downloaded 492076
[  118.125327] WLAN FW is active
[  118.128339] on_time is 117031133000
[  118.163590] fw_cap_info=0x181c0f03, dev_cap_mask=0xffffffff
[  118.169231] max_p2p_conn = 8, max_sta_conn = 8
[  118.224336] wlan: version = SDIW416---16.92.21.p41.1-MM5X16322.p3-(FP92)
[  118.237363] wlan: Register to Bus Driver Done
[  118.247007] wlan: Driver loaded successfully
...
透过以下命令做设置并搜寻笔者的 iPhone 设备。
root@imx8ulpevk:~# hciattach ttyLP2 any 115200 flow
Setting TTY to N_HCI line discipline
Device setup complete
root@imx8ulpevk:~# [  191.456068] NET: Registered PF_ALG protocol family
root@imx8ulpevk:~# hciconfig hci0 up
root@imx8ulpevk:~# bluetoothctl
Agent registered
[CHG] Controller 9C:50:D1:45:25:96 Pairable: yes
[bluetooth]# power on
Changing power on succeeded
[bluetooth]# default-agent
Default agent request successful
[bluetooth]# pairable on
Changing pairable on succeeded
[bluetooth]# scan on
Discovery started
[CHG] Controller 9C:50:D1:45:25:96 Discovering: yes

...

[NEW] Device 57:50:49:41:54:55 WPIATU_Benson
[NEW] Device XX:XX:XX:XX:XX:XX Benson_iPhone

...

[bluetooth]# scan off
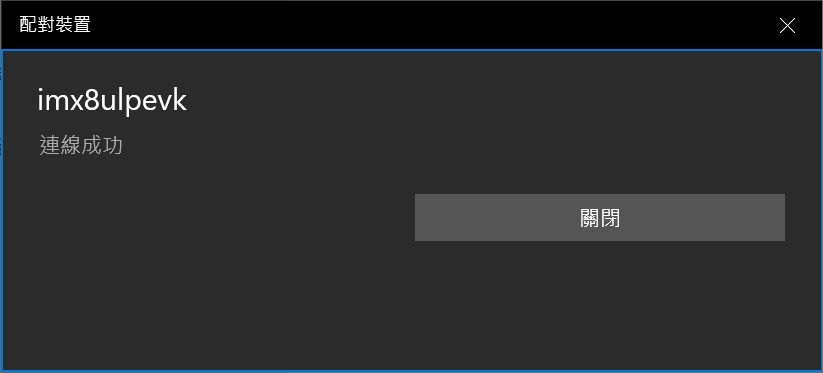
Pair 笔者的 PC。
pair 57:50:49:41:54:55
接着 PC 上就会出现确定 PIN 码的讯息。
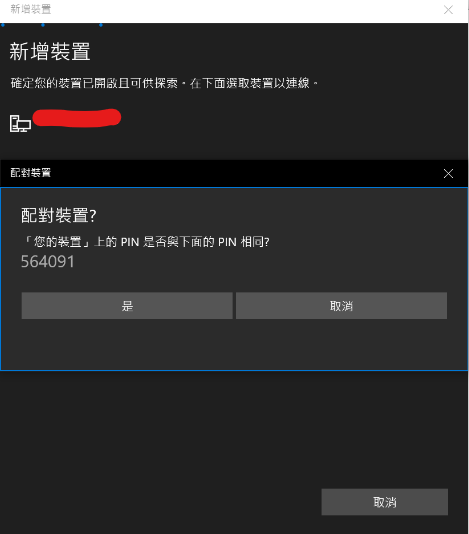
最后 Pair 就成功啰。
六、 结论
世平集团针对 NXP 的 MPU 相关技术整理了一系列博文,而本篇文章主要初步的介绍了如何验证 NXP 的 i.MX8ULP 这片公板上面的 Display 、 Camera 与 网路 相关功能;那其它功能的测试与验证相关资讯有兴趣的读者们可以参考别篇 ATU Book 系列的文章,希望本篇文章的内容可以让各位读者对 i.MX8ULP 有更深入的体会,若未来读者们有 i.MX 系列处理器的相关问题欢迎随时与世平集团做讨论。
五、参考文件
[1] https://www.ite.com.tw/zh-tw/product/view?mid=146
[2] https://developers.google.com/speed/public-dns
[3] https://www.murata.com/zh-cn/products/connectivitymodule/wi-fi-bluetooth/overview/lineup/type1xk
[4] https://www.twblogs.net/a/5b8c28662b7177188330e37a
[5] https://www.intel.com.tw/content/www/tw/zh/tech-tips-and-tricks/what-is-a-hotspot.html
[6] https://zh.wikipedia.org/zh-tw/服务集
[7] https://en.wikipedia.org/wiki/Udhcpc
评论