

► 前言
在深度学习的领域中,神经网络的架构设计是一个重要而困难的问题。传统的方法是人工设计或者使用经验法则来选择合适的架构,但这种方法往往需要大量的时间和专业知识。为了解决这个问题,2016年Neural Architecture Search with Reinforcement Learning提出一种新的方法,称为神经网路架构搜索(Neural Architecture Search,NAS),利用优化算法搜寻可能的神经网路空间,并自动找到最佳的架构,从而提高模型的性能和效率,本文将介绍一种基于NAS的物件侦测模型称为Yolo-NAS。
► 什么是YOLO-NAS?
目标检测是计算机视觉中的一项重要任务,它使机器能够识别和定位图像或视频中的物体。这项技术在自动驾驶汽车、面部识别系统等许多应用中发挥了重要作用。推动目标检测进步的一个关键因素是发现了强大的神经网络架构,例如Faster R-CNN和YOLO等。
YOLO(You Only Look Once)为主流的目标检测方法之一,第一个版本于2016年推出,通过将目标检测视为单个回归问题来改变目标检测的执行方式,将图像划分为网格并同时预测边界框和类别概率。自第一个YOLO架构问世以来,已经开发多种基于YOLO的架构延伸模型架构,以其准确性、实时性能、边缘设备及云端实现目标检测而闻名,目前最先进的模型的版本为YOLOv5、YOLOv6、YOLOv7和YOLOv8。
然而,现有的YOLO模型仍然面临一些限制,例如量化支持不足、定位精度不高以及准确性和延迟之间的权衡不足。因此,在 YOLOv8 之后,深度学习公司Deci.ai基于YOLOv6开发出一种新的目标检测模型 YOLO-NAS,解决之前 YOLO(You Only Look Once)模型的的问题。
Deci.ai公司开发专有神经架构搜索技术AutoNAC产生YOLO-NAS模型。AutoNAC引擎用于确定阶段的最佳尺寸和结构,包括块类型、块数量和每个阶段的通道数量,找到最佳架构。YOLO-NAS模型在包括COCO、Objects365和Roboflow 100在内的知名数据集上进行预训练模型。Deci.ai从这个区域中采样了三个点,分别创建YOLO-NAS-S、YOLO-NAS-M和YOLO-NAS-L三种不同大小的模型。
新型YOLO-NAS提供最先进(SOTA)的性能,性能具有无与伦比的精度及速度,优于YOLOv5、YOLOv6、YOLOv7和YOLOv8等模型。
|
Model |
mAP |
Latency (ms) |
|
YOLO-NAS S |
47.5 |
3.21 |
|
YOLO-NAS M |
51.55 |
5.85 |
|
YOLO-NAS L |
52.22 |
7.87 |
|
YOLO-NAS S INT-8 |
47.03 |
2.36 |
|
YOLO-NAS M INT-8 |
51.0 |
3.78 |
|
YOLO-NAS L INT-8 |
52.1 |
4.78 |
上表中为为官方GitHub提供,内容为Coco 2017 Val数据集中的mAP以及模型在Nvidia T4 GPU上执行640x640图像进行测试的延迟时间。
►YOLO-NAS的实现
可以使用Google Colab编写执行程式码,如果在自己电脑上执行,需要先安装符合Nvidia显卡的PyTorch版本,然后安照以下步骤:
Step 1. 在自己电脑上可以安装anaconda,如果使用Google Colab直接跳至Step 3
conda create --name YoloNas python=3.8 -y
conda activate YoloNas
Step 2. 安装Torch
Step 3. 安装super-gradients
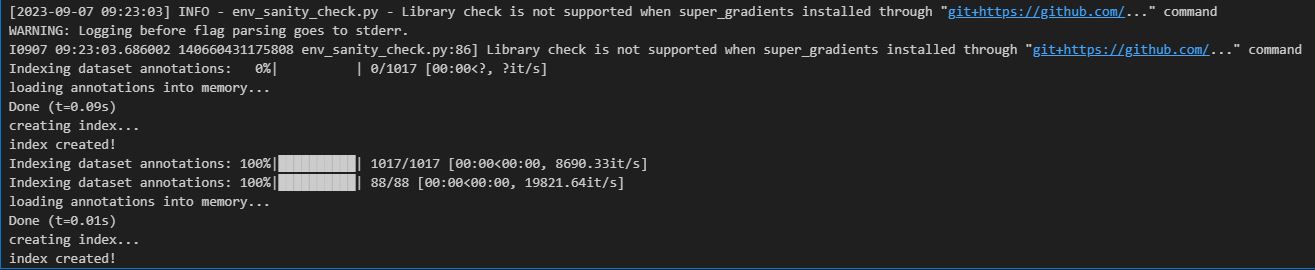
pip install super-gradients透过以上三个步骤,就完成YOLO-NAS环境建置
接下来是程式码的部分,以下程式码使用COCO Dataset的格式
设定资料集位置及相关参数
from super_gradients.training.datasets.detection_datasets.coco_format_detection import COCOFormatDetectionDataset
from super_gradients.training.transforms.transforms import DetectionMosaic, DetectionRandomAffine, DetectionHSV, \
    DetectionHorizontalFlip, DetectionPaddedRescale, DetectionStandardize, DetectionTargetsFormatTransform
from super_gradients.training.utils.detection_utils import DetectionCollateFN, CrowdDetectionCollateFN
from super_gradients.training import dataloaders
from super_gradients.training.datasets.datasets_utils import worker_init_reset_seed


trainset = COCOFormatDetectionDataset(data_dir="./aicheckout",
                                      images_dir="train",
                                      json_annotation_file="train/_annotations.coco.json",
                                      input_dim=(640, 640),
                                      ignore_empty_annotations=False,
                                      transforms=[
                                          DetectionMosaic(prob=1., input_dim=(640, 640)),
                                          DetectionRandomAffine(degrees=0., scales=(0.5, 1.5), shear=0.,
                                                                target_size=(640, 640),
                                                                filter_box_candidates=False, border_value=128),
                                          DetectionHSV(prob=1., hgain=5, vgain=30, sgain=30),
                                          DetectionHorizontalFlip(prob=0.5),
                                          DetectionPaddedRescale(input_dim=(640, 640), max_targets=300),
                                          DetectionStandardize(max_value=255),
                                          DetectionTargetsFormatTransform(max_targets=300, input_dim=(640, 640),
                                                                          output_format="LABEL_CXCYWH")
                                      ])


valset = COCOFormatDetectionDataset(data_dir="./aicheckout",
                                    images_dir="valid",
                                    json_annotation_file="valid/_annotations.coco.json",
                                    input_dim=(640, 640),
ignore_empty_annotations=False,
transforms=[
DetectionPaddedRescale(input_dim=(640, 640), max_targets=300),
DetectionStandardize(max_value=255),
DetectionTargetsFormatTransform(max_targets=300, input_dim=(640, 640),
output_format="LABEL_CXCYWH")
])
train_loader = dataloaders.get(dataset=trainset, dataloader_params={
"shuffle": True,
"batch_size": 4,
"drop_last": False,
"pin_memory": True,
"collate_fn": CrowdDetectionCollateFN(),
"worker_init_fn": worker_init_reset_seed,
"min_samples": 512,
})
valid_loader = dataloaders.get(dataset=valset, dataloader_params={
"shuffle": False,
"batch_size": 4,
"num_workers": 2,
"drop_last": False,
"pin_memory": True,
"collate_fn": CrowdDetectionCollateFN(),
"worker_init_fn": worker_init_reset_seed
})
设定训练参数,可以调整max_epochs设置最大执行的次数,num_classes及num_cls为几个类别需要依照资料集类别进行调整
from super_gradients.training.losses import PPYoloELoss
from super_gradients.training.metrics import DetectionMetrics_050
from super_gradients.training.models.detection_models.pp_yolo_e import PPYoloEPostPredictionCallback

train_params = {
    "warmup_initial_lr": 1e-6,
    "initial_lr": 5e-4,
    "lr_mode": "cosine",
    "cosine_final_lr_ratio": 0.1,
    "optimizer": "AdamW",
    "zero_weight_decay_on_bias_and_bn": True,
    "lr_warmup_epochs": 3,
    "warmup_mode": "linear_epoch_step",
    "optimizer_params": {"weight_decay": 0.0001},
    "ema": True,
    "ema_params": {"decay": 0.9, "decay_type": "threshold"},
    "max_epochs": 10,
    "mixed_precision": True,
    "loss": PPYoloELoss(use_static_assigner=False, num_classes=11, reg_max=16),
    "valid_metrics_list": [
        DetectionMetrics_050(score_thres=0.1, top_k_predictions=300, num_cls=11, normalize_targets=True,
                             post_prediction_callback=PPYoloEPostPredictionCallback(score_threshold=0.01,
                                                                                    nms_top_k=1000, max_predictions=300,
                                                                                    nms_threshold=0.7))],

    "metric_to_watch": 'mAP@0.50'}
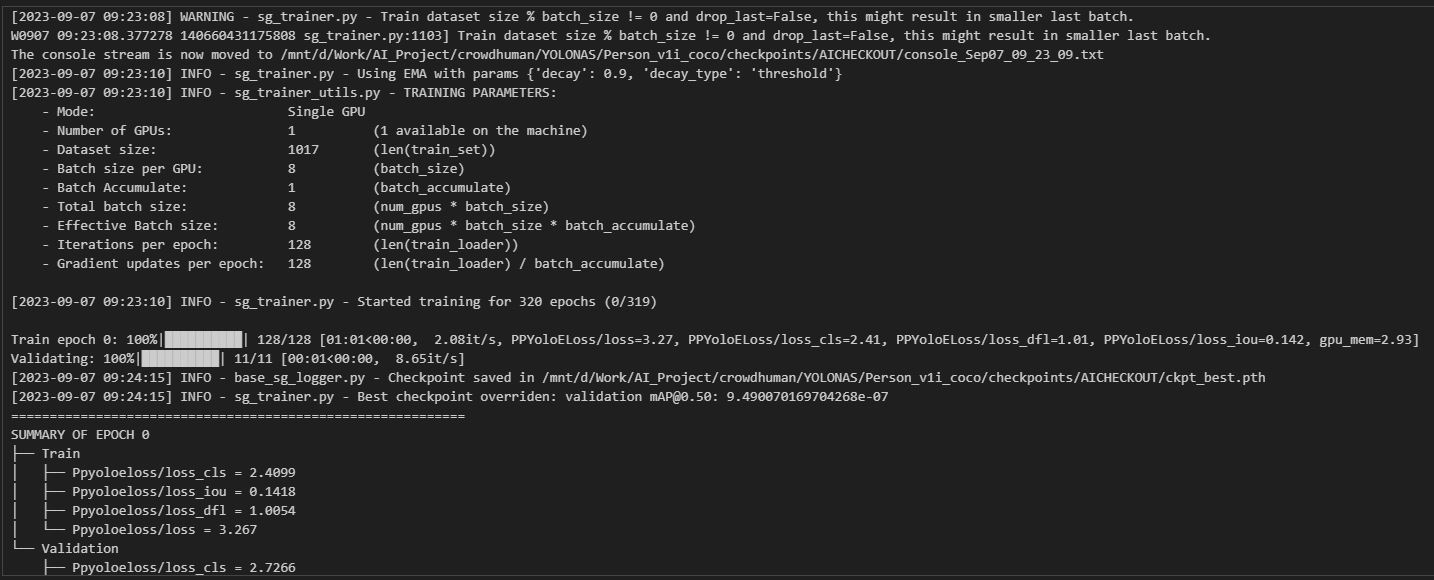
开始训练模型,num_classes为几个类别需要依照资料集类别进行调整,pretrained_weights使用哪种预训练模型,Models训练哪种大小的模型(YOLO-NAS-S、YOLO-NAS-M和YOLO-NAS-L),执行后开始训练模型
from super_gradients.training import Trainer
from super_gradients.common.object_names import Models
from super_gradients.training import models
from super_gradients.training.processing import ComposeProcessing

net = models.get(Models.YOLO_NAS_S, num_classes=11, pretrained_weights="coco")
trainer = Trainer(experiment_name="AICHECKOUT", ckpt_root_dir="./checkpoints/")
trainer.train(model=net, training_params=train_params, train_loader=train_loader, valid_loader=valid_loader)
测试图片查看状况
import os
net = models.get(Models.YOLO_NAS_S, num_classes=11, checkpoint_path=os.path.join(trainer.checkpoints_dir_path, "ckpt_best.pth"))
prediction = net.predict("test/test.jpg", fuse_model=False)
prediction.show()
输出ONNX,可在自行转换其他模型
import torch
net.eval()
net.prep_model_for_conversion(input_size=[1, 3, 320, 320])
dummy_input = torch.randn([1, 3, 320, 320], device="cpu")
torch.onnx.export(net, dummy_input, "yolo_nas_s-sg.onnx", opset_version=11)

► 小结
YoloNAS是一种基于NAS技术的YOLO系列模型的延伸,在物体检测方面提供优异的性能和效率,你可以参考这里的程式码训练自己的模型,希望这篇博文对你有所帮助,谢谢你的阅读!
► 参考资料
YOLO-NAS | YOLO新高度,引入NAS,出于YOLOv8而优于YOLOv8
► Q&A
问:YOLO-NAS的全名是什么?
答:YOLO-NAS的全名是You Only Look Once-Neural Architecture Search。
问:什么是YOLO-NAS?
答:YOLO-NAS是一种基于神经架构搜索(NAS)的物件侦测方法,它可以自动设计高效且准确的神经网路,用于实时的物件侦测任务。
问:YOLO-NAS有什么优势?
答:YOLO-NAS可以根据不同的任务和资源限制,找出最适合的物件侦测模型。YOLO-NAS可以节省人工设计模型的时间和成本,并提高模型的效能和泛化能力。
问:YOLO-NAS适用于哪些场景?
答:需要快速且准确地侦测物件的场景,例如安全监控、医学影像、人脸识别等。
问:YOLO-NAS需要多少时间和资源?
答:YOLO-NAS的时间和资源消耗取决于搜索空间的大小、评估函数的复杂度和停止条件。一般来说,YOLO-NAS需要几个小时到几天的时间,以及一个或多个GPU的资源。
评论